My Experience
|
My project consisted of making a 3D model of a '69 GTO and then rendering it. As most people are not familiar with how 3D modeling works, I will explain as best as I can.
The program that I use, SketchUp, is a surface based modeler. This means that I draw lines and if they are coplanar (flat), then a face will appear between them. To make a car this way, the most important thing is to have a plan, these usually consist of a multiview orthographic (no perspective) drawing. The next step is to take that drawing, insert it into the modeling program, scale it to be the size of the car and then cut each view from and form a box with the views on the opposite sides. With this box, you can find the position of any point on the object in three dimensions by adjusting the view. To model a more modern car, like this one, you then would take the outline of the edge of the front of the car, copy it multiple times, scale those cross sections to the appropriate size and connect the edges until you have a the whole side of the car. With this you then form the rest of the main shape of the car using the same method and add any last finishing touches.
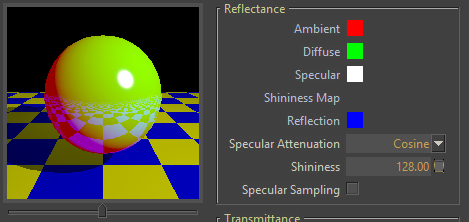
Ambient: color of item when no light reaches it, Diffuse: color of item when lit, Specular: Shine mark color and intensity, Reflections: reflectiveness and color
|

The crescents on the right were lofted to form the curvature of the fenders
|
|
|
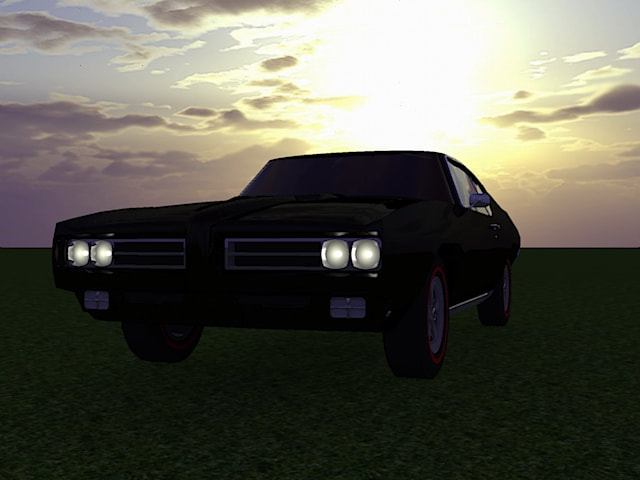
Once I completed the model, I then exported it into a rendering program, Kerkythea in my case. Some rendering programs may, but mine does not affect the form of the model. All that it does is allow materials to be applied to the faces to make them look like any material and create realistic lighting using a time consuming process known as ray tracing. The cornerstone of creating materials is four colors: ambient color, diffuse color, specular mapping and reflection. These four things control the appearance of simple materials, such as car paint and chrome. As I had rendered a few other models before, I had experience with the program, but not much. The first renderings I made were of the GTO in all the factory paint colors. Mr. Armelie preferred the black, so I made several more renderings in black. As I gained more experience with the program, the renderings became higher quality with time.
|
Work by date:
|
2/13/17
Researched 1969 Pontiac GTO 2/14/17 Modeled Rims 2/16/17 Modeled Rims, Computer crashes before saving, all progress lost 2/17/17 Modeled Rims 2/17/17 Put PMD (Pontiac Motor Division) Logo onto hubcap 2/18/17 Modeled Tires 2/18/17 Remodeled tires to better match 1960's bias ply tires Started Outlining contours of side view 2/19/17 Started Modeling Fender and other side body panels 2/19/17 Continued Modeling Fender and side panels Modeled Hood 2/20/17 Modeled Bumper 2/20/17 Modeled Hood Scoop 2/24/17 Modeled Lower Bumper Modeled Roof 2/25/17 Modeled Roof Reshaped Hood Scoop and Windshield Modeled Front Wheel Well 2/26/17 *An error occurred with the file, no work from the 25th was saved. Modeled Roof and tweaked windshield 2/27/17 Reshaped C Pillar multiple times Reshaped rear fender Reshaped hood scoop modeled Front wheel well 2/28/17 Modeled and remodeled C pillar 3/04/17 Modeled Rear and bumper Modeled Tail Lights Modeled Exhaust Pipe Modeled simple Undercarriage Merged components to simplify the model Added chrome detailing to the side of the car 3/05/17 Detailed Front Bumper 3/06/17 Modeled Grille Smoothed out grid lines Erased unnecessary edges 3/08/17 Modeled Windows Tweaked Hood 3/10/17 Modeled creases in the sides to create doors Tweaked rear form Modeled Rear Window Refined various details throughout the body 3/11/17 Modeled creases into the front and rear to make the hood and trunk Refined the roof and rear window Added lugnuts to the rims Modeled Headlamps Fine tuned various details 3/12/17 Modeled side mounted rear view mirror Tweaked shape of trunk Added small lights in headlamps Rendered several renderings of the GTO (Black WIP GTO 2) 3/13/17 Refined low beam headlights to render more accurately 3/14/17 Remodeled tail lights to be more accurate Added "GTO" emblems throughout the car 3/15/17 Added ventilation slits to the rear of the hood Started modeling license plate 3/19/17 Modeled license plate 3/14/17 Rendered 3/21/17 Rendered 3/22/17 Rendered 4/3/17 Rendered 10/24/17 Rendered 11/5/17 Rendered 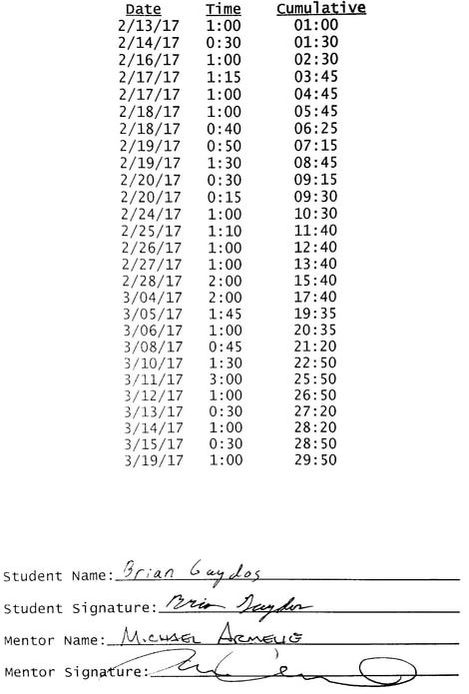
|
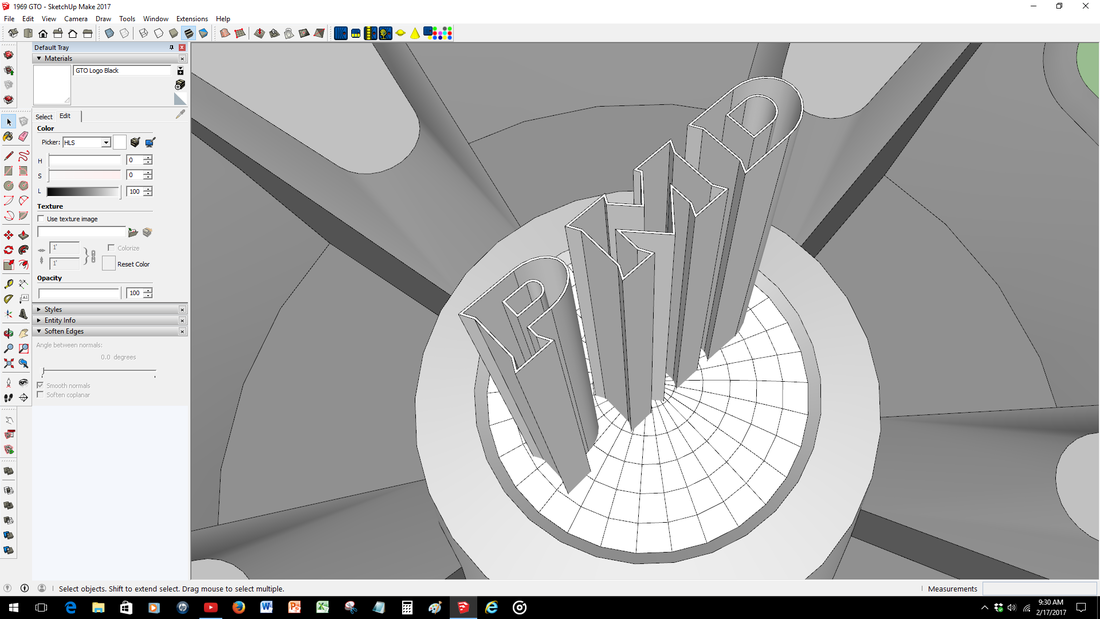
The extruded letters intersect allow for them to appear to be printed onto the center of the wheel
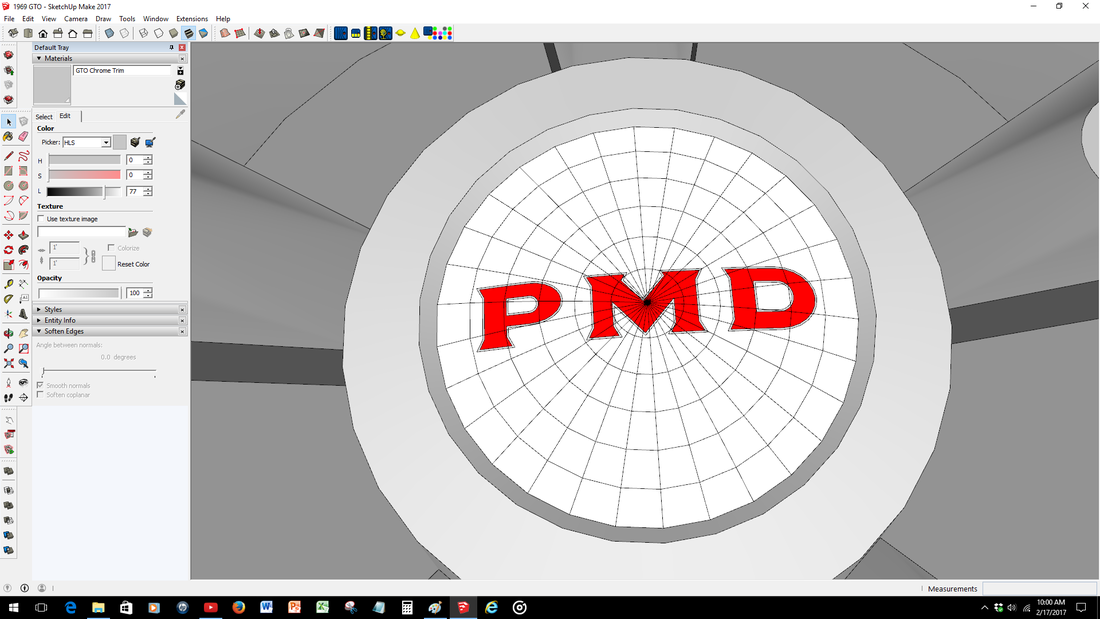
The final product (the dome is left white to make the image clearer)

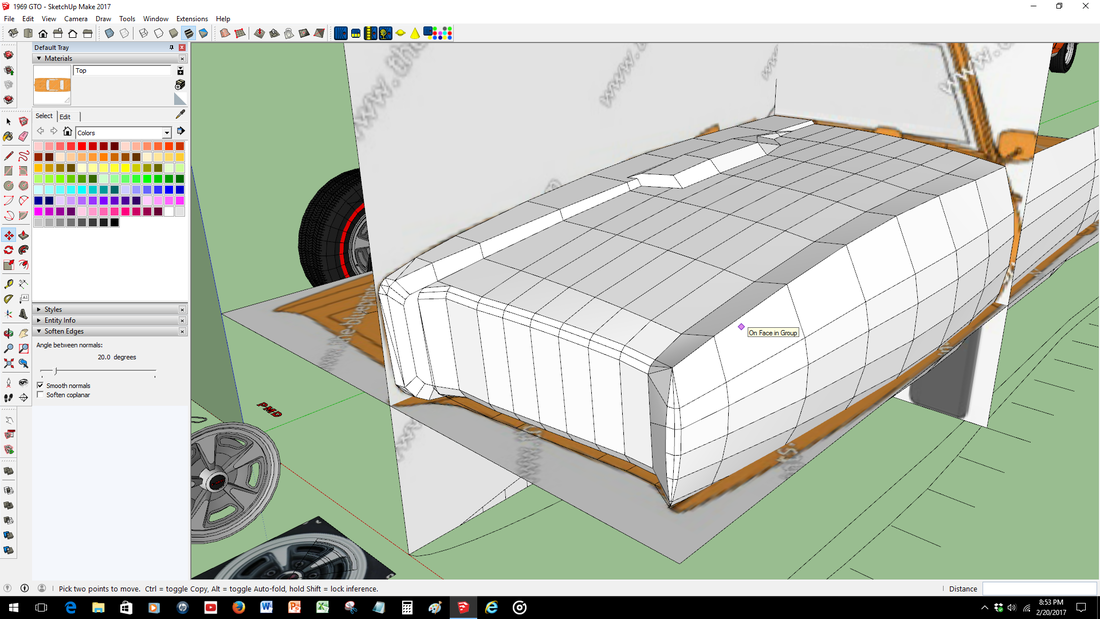
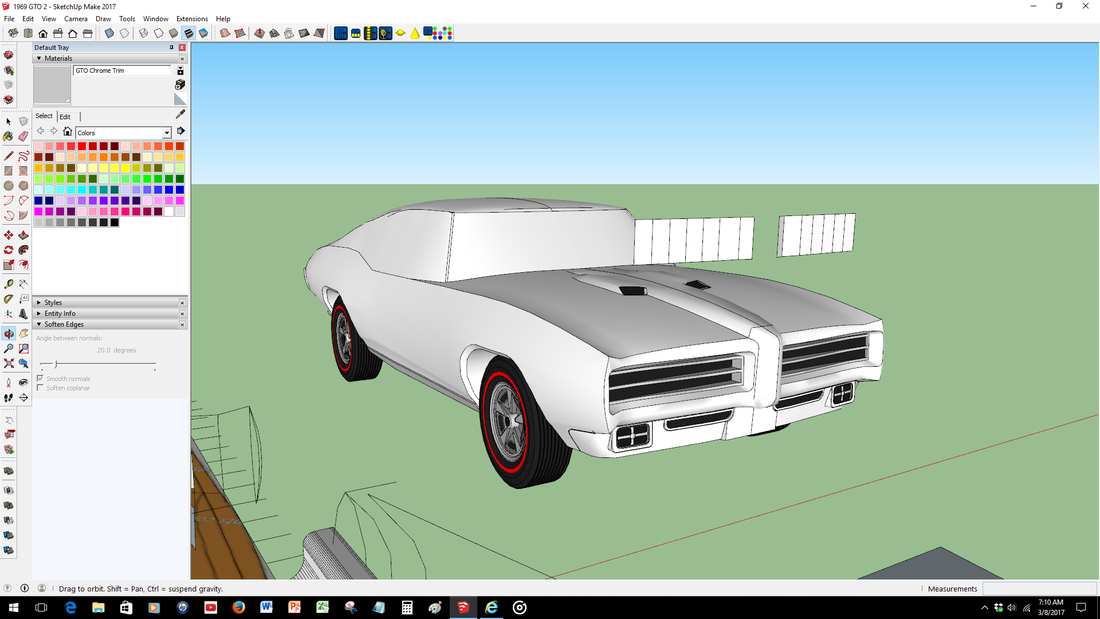
The cross sections each have the same number of edges. This allows for them to be easily connected to form the side of the car (center)
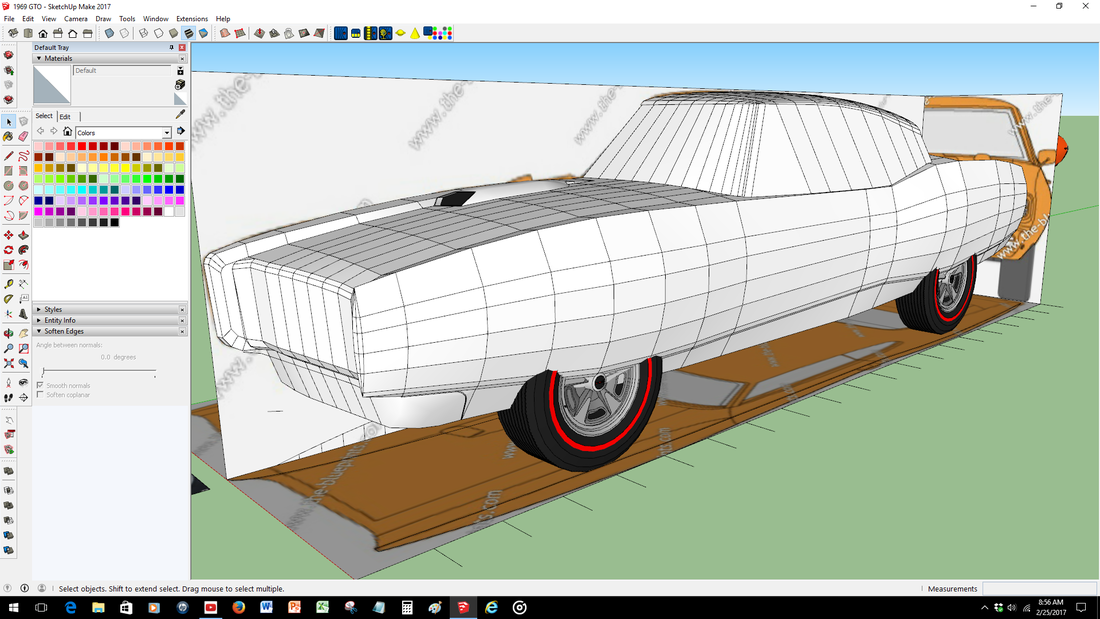
Since some edges are left visible, the geometry of the car is clearly visible
The majority of the car (missing C-pillar and rear) with minimal softening

Close up of the headlights. Note the indentation on the left of the lights. This is mimicking the seam that would appear with the vacuum headlights. Mr. Armelie's car does not have the option, so the indentation was later removed
The floating white extrusions were used to create the bumper
|
